
In this article, we will suggest steps that you can use with your production line right now to make the most of your current ultrasonic cleaning system. We will also provide ideas to maximize the return on your next investment in cleaning equipment.
Cleaning & Ultrasonics Basics
Cleaning is the removal of soils, which are best thought of as matter out of place. Soils can be particles, thin film, or a combination of the two; and soils can originate from prior processing or from other contaminants that land on a particular part. Ultrasonics in wash and rinse tanks has become a powerful tool to improve the productivity of metal finishing operations via high-volume general cleaning, as well as through precision cleaning. Ultrasonics can boost the effectiveness of both aqueous and solvent cleaning for the removal of particulate and thin-film contamination.
Agitating the wash tank may not be enough to remove soils. High-pressure spray can improve soil removal, but the spray is line-of-sight—which makes cleaning ornate parts with blind holes or helicoils problematic. Ultrasonics is omnidirectional, meaning the cleaning force can attack soils from all directions.
As sound waves travel through a liquid, areas of compression and rarefaction occur. Under the right conditions, during rarefaction, the liquid is effectively pulled apart and vapor-filled bubbles (more precisely termed “voids”) form. During compression, the bubbles implode violently. The cleaning power of ultrasonics comes as a result of the momentary localized pressure, heat, and shock wave associated with this violent implosion.1
Many fabricators and finishers routinely use ultrasonics for the cleaning and surface preparation of metal parts; still more are considering moving to ultrasonic systems. (Some very basic ultrasonic variables are indicated in Table 1.) Choosing the right ultrasonic system for your application and making the most of the system you currently own depends on understanding the variables.
The Lights Are On; Is Anyone Home?
Because you are unlikely to hear even low ultrasonic frequencies, noise is not a sign of functionality. Vibrations and disturbances at the surface can also lead to a false sense of security. It is wise to monitor the ultrasonic tank periodically and check several locations within a tank.
Ultrasonic monitors are commercially available, and some groups find them to be useful. However, the simplest, least expensive, and most widely used monitoring tool for ultrasonic functionality is a roll of regular-weight (not heavy-duty) aluminum foil. Cut off a piece of foil but do not overly smooth it. Now submerge the foil in the degassed ultrasonic tank for a set amount of time (usually 30 to 45 seconds). Lastly, remove and observe the foil. If the ultrasonic system is functional, you should see a characteristic orange-peel erosion pattern.
To avoid contaminating the tank with bits of aluminum foil, fill a glass or electropolished stainless-steel beaker with your cleaning agent, place the beaker in the tank, and run the test in the beaker.
Heat
More Is Not Always Better
Adding heat does not necessarily result in the more efficient or effective use of an ultrasonic system. As a fluid heats, the viscosity decreases. This makes it easier for cavitation bubbles to form during the rarefaction phase. However, the actual cleaning action is provided by the shock from the violent collapse of these bubbles during the compression phase, and as the temperature increases so does the vapor pressure of the liquid.
At high temperatures, the cavitation bubbles become filled with a gas—the fluid vapor. This gas has a cushioning effect, causing the bubble collapse to take longer, thus decreasing the magnitude of the shock wave. At very high temperatures, the vapor-filled bubbles become so “cushy” that during the compression phase, they might not fully collapse, so there is no shock wave.
There is a balancing act. For each aqueous or solvent-based cleaning agent, there is an optimal temperature at which ultrasonic cavitation is most effective. Above this particular optimal temperature, ultrasonic effectiveness actually decreases and eventually ceases.
Passive and Active Overheating
Overheating can happen passively or actively. In passive overheating, the ultrasonic tank is left on throughout the work day. The transducer is the device that converts electric power into vibratory motion, creating the ultrasonic waves. Heat from the transducer increases the temperature of the cleaning agent. It is common practice, especially with relatively small benchtop systems, to depend on the transducers to heat the tank. One problem with this practice is lack of process control, sort of a “Goldilocks and the Three Bears” phenomenon. If the tank is too hot, perhaps later in the production shift, there may be little or no ultrasonic action. If the tank is too cold, fluid viscosity is higher and cavitation efficiency is less than optimal.
Sometimes, systems are actively overheated. We have observed ultrasonic systems where the cleaning agent is heated to near the boiling point. When asked, the person in charge has often told us that the cleaning is more effective at these higher temperatures. If efficacy of cleaning is indeed better at temperatures near the boiling point, the improved cleaning is due to heat effects, suggesting the ultrasonics probably have little to no impact on cleaning.
The most direct way to check for overheating is to use the aluminum foil test. You may find that at lower temperatures you are actually achieving more efficient use of the ultrasonics. Once an appropriate temperature or temperature range has been determined, there are several benefits to monitoring the temperature of the ultrasonic process bath. These include effective/consistent cleaning, energy savings, and cost savings.
New Systems
If you are considering a new cleaning system, be sure to test it before you make a purchase. You want to make sure the ultrasonic process, not heating action alone, is doing the actual cleaning. It might be better to test several alternative cleaning agents, and/or use some other cleaning force, such as rotation in a fixture or turbulation.
Processing Time
Employing longer time lengths for ultrasonic processing does not necessarily translate into more effective cleaning. Ultrasonic cleaning is usually accomplished rapidly (Fig. 1). Studies of particle removal2 indicate that most particles are removed within the first 30 seconds and that little additional benefit is gained after 5 minutes of ultrasonics. Optimal times for ultrasonic cleaning can vary, and in some cases a longer period of time may be required. However, we have periodically observed ultrasonic cleaning times ranging from 30 minutes to several hours. If your process requires such lengthy ultrasonic cleaning, we suggest that you re-evaluate your process.
|
In fact, extended ultrasonic cleaning can be counterproductive. Although ultrasonic cleaning has been accomplished successfully for decades, with ultrasonic cleaning comes the potential for surface modification, including erosion. This potential is particularly high in thinner, somewhat stressed areas.3 Use ultrasonics wisely and in a controlled manner.
Fixturing
Too often, it is assumed that simply tossing the parts in an ultrasonic tank will magically result in effective cleaning. Although ultrasonic action is omnidirectional, achieving clean parts is not automatic. Investing time in appropriate orientation and fixturing of the parts tends to yield more effective ultrasonic cleaning and faster throughput.
Placement
It would be difficult to clean the starboard of the “Queen Mary” by placing the transducer on the port side. In cleaning large, heavy-metal parts, or large baskets of parts, keep in mind that even a very large transducer has limitations. Parts rotation can be an important adjunct to maximizing ultrasonic effectiveness. For ornate parts with blind holes, or for adherent soils, parts rotation can be important in moving the soil away from the parts. Another approach is to use a submersible transducer.
Overfilling
We often observe assemblers filling ultrasonic tanks to the brim with parts in a futile attempt to expedite throughput. These efforts are often counterproductive in that cleaning becomes ineffective while causing the reject or rework rate to go up. In sizing new systems, it is a good idea to factor in required throughput and consider production peaks when rapid throughput in the cleaning system will be required. If more than one supplier is bidding on a job, there can be a temptation to bid on a smaller system to achieve the lowest bid. Selecting a less-expensive, inadequately sized system may be counterproductive in the long run, especially if operators have to keep overfilling the ultrasonic tanks just to keep up with current production.
With existing systems, even if operators have undergone initial training or refresher training courses (or, even better, educational courses), adjusting the work flow and equipment-operating procedures can result in more efficient throughput and better cleaning.
Fixture Materials
If beakers are used, glass or electropolished stainless steel are best. Ultrasonics do not effectively transmit through soft materials. This means that, in general—with the exception of some hard plastics—plastic fixtures and baskets are ill-advised. Examples of inappropriate use of plastics with ultrasonics include soft plastic beakers to hold small parts, plastic clips to position very small objects, and plastic sheets to hold baskets in position.
Mesh Width
Fixtures should allow the fluid to circulate to maximize soil removal. Wire mesh baskets allow such circulation, but it is important to consider the mesh size as some mesh widths interfere with ultrasonic transmission. At critical mesh sizes, the basket can cause destructive interference that attenuates the amplitude of the sound. This effect is frequency dependent, and it is important to check with the manufacturer of the system to determine optimal fixture configurations. In general, very small mesh acts like a solid, thereby transmitting the ultrasonic waves. Very wide-spaced mesh does not produce significant interference.
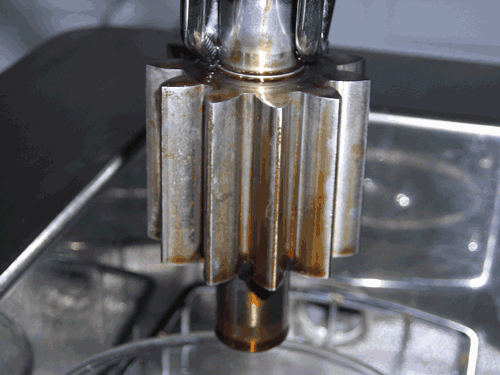
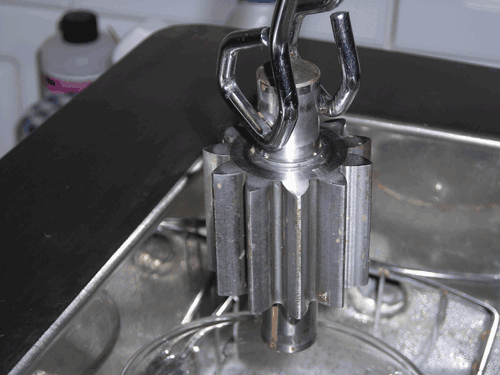
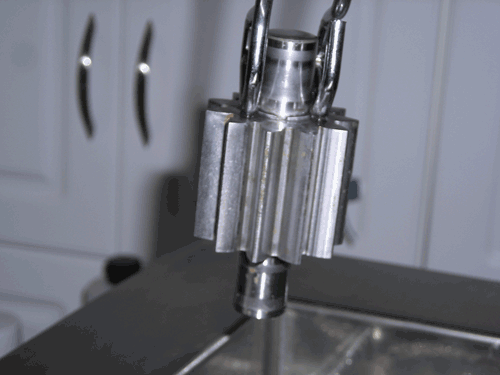
Fixture Condition
The cleaning process should not add contamination to your parts. Periodically inspect the fixtures and baskets used in ultrasonic cleaning for signs of visual degradation. The fixtures go through the cleaning process many times; the parts hopefully only once. Repeated exposure to heated cleaning agents, particularly in the presence of ultrasonic energy, can result in erosion and particle generation.
It is common to purchase a new ultrasonic cleaning system, along with a few new baskets, and then find that the required throughput is greater than planned. Resist the temptation to use the old fixtures and baskets, particularly if they are not in good condition.
Processing Smaller Batches & Testing New Cleaning Agents
It is not always necessary to fill the entire tank with cleaning solution. Washing parts in beakers of cleaning agent may be appropriate for smaller critical parts and for preliminary testing of new cleaning agents. The beakers can be placed in an ultrasonic bath containing water with a surfactant. The surfactant acts to lower the surface tension of the water and promote cavitation. This approach is typically not appropriate for routine, high-volume cleaning, especially if oil-splitting cleaning chemistries are used. Many ultrasonic systems have a weir or sparger to remove oils and soils from the surface. Cleaning in beakers overrides the effectiveness of such oil removal systems.
Features and New Systems
By now, many of you are thinking something along the lines of: “But they have not mentioned sweep, pulse, very-high-frequency ultrasonics, designer wave forms, multiple frequencies in a single tank, or sequential tanks with different frequencies in each tank.” All true, but we have elected to start with the basics. Newer ultrasonic systems are complex and require a great deal of thought and choice. In our opinion, some manufacturers select complex systems without really taking advantage of the capabilities of a basic system. Perhaps in a future article, we will discuss specific ultrasonic features in greater detail.
For now, we suggest that you observe your current system. Evaluate whether or not you are getting cavitation. Determine and record the brand, model, serial number, and the ultrasonic frequency. Check the settings. Then—not during routine production—pragmatically test the variables you have in your current system to see if you are functioning in an optimal situation. Of course, if you change any settings, put them back to the way they were, and make sure you have the go-ahead to change the process. Then document the changes, the new routine, and how they effect ultrasonic process conditions.
Notes
- Suslick K, Flannigan D. Plasma formation and temperature measurement during single-bubble cavitation. Nature 2005;434 (March 3):52–5.
- Harmon J, Branson Ultrasonics Corporation, personal communication.
- Kanegsberg B, Kanegsberg E. Parameters in ultrasonic cleaning for implants and other critical devices. Journal of ASTM Int’l 2006 (Apr.);3(4).
About the Authors
Barbara and Ed Kanegsberg, BFK Solutions LLC, are independent consultants who help manufacturers improve cleaning and building processes. They can be reached at (310) 459-3614 or via e-mail.


